
| Articles | Documents | Equipment | Events | Links | Membership | Miscellaneous | Scrapbook | Targets | What's New |
|
Bladeology Another Western Knife Re-Handle Job | July 2017 | ||
| Sam Martinez
| |||
|
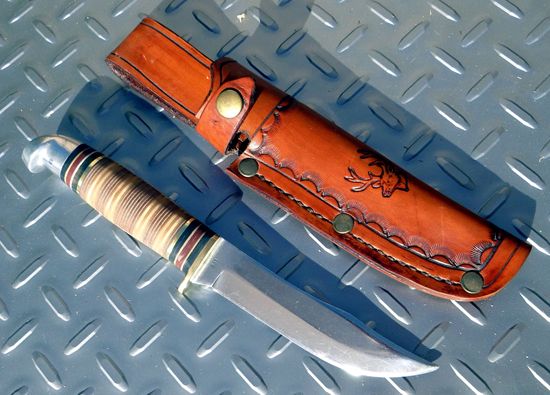
The L66 (pre-1978 Boulder-made split tang) featured in this article is one of those knives. It came into my possession because my dad had an extra one, I needed something to do while on leave, and I was the only Martinez boy without an old Western knife. As you can see in the photo below, the leather on the handle was not great. It was devoid of color, and as dried up as a saguaro skeleton in the desert. I had seen the repair work that my brother and dad had done on their Westerns, and while they looked good, I wanted to try and preserve the look of the original knife. I was after that distinctive transverse grain pattern that comes from the stacked leather washers. The problem is, it would be next to impossible to build a bunch of leather washers and stack them into the handle, because the rear pommel is not easy to remove. It is pinned in place, and therefore on there as snug as a bug. As a result, I needed an alternative approach. After some discussion with my dad, I decided that I would try to make a stacked leather look-a-like out of wood. Fortunately, there were a few small strips of assorted scrap wood in the garage that would fit the bill. I cut the strips of wood into pieces that were about 0.5” tall by 1” wide and the thickness of the wood strip (about 1/8” to 1/4”). I created a small jig in a table top vice, and then began stacking the pieces of wood together and applying two-part epoxy to each side of the little pieces of wood as they got layered together. Once I got the pieces arranged on their end, stacked and glued together, I locked down the vice to compress the pieces of wood into one laminated handle half.
After a fair bit of time on the belt sander, the final product took shape, and can be seen in the first photo. I finished the wood using gun stock Tru-Oil to protect the wood and give it a subtle shine. The knife now has new life and got paired with a new sheath that my dad had previously made. Now I have a cool and functional new, old hunting knife, ready for a new life. © Honeywell Sportsman Club. All rights reserved. | |||

| If you enjoyed this story, or found it useful, please consider clicking here to join the NRA at a discount of $15 off the normal membership cost. You will be supporting both this website and adding your voice in support of the Second Amendment. Thank you very much. |

|
|
|